A guide to client onboarding: 7 steps to happier clients and less churn
Client onboarding is a vital part of your business – get your clients off on the right foot.

"You're going to be defined by your first 90 days. You've got to act."
- Jack Welch, former GE CEO
Did you know that clients are three times more likely to churn during the first 90 days?
While Jack’s statement was referring to new employees, you could argue that client onboarding is just as (if not more) important. Done well, and it marks the beginning of a productive and profitable partnership. Done poorly, however, and alarm bells might start ringing.
It doesn't matter whether you're an accounting practice, business consultancy, digital agency, wealth management firm, or any other client-focused business—your onboarding process is incredibly important.
Today I'm going to show you everything you need to know about client onboarding and provide actionable advice to improve your process.What is client onboarding?
Client onboarding is the process of welcoming new clients into your business. It’s your opportunity to begin building a strong relationship, get the client up to speed, address any queries they have, and outline the strategy going forward.
You ultimately want the client to feel like they’ve made the right choice and that your practice will fulfil their varying needs.
Easy, right?
The importance of client onboarding
Client onboarding isn’t just a nice add-on—it’s a crucial business strategy. When done effectively, it leads to:
Less client churn: As previously mentioned, clients are at high risk of churning in the first 90 days. Aim to build relationships and demonstrate value early on in their journey to help them stick.
More efficiency: Onboarding helps you just as much as it helps your clients. It gives you need-to-know information at your fingertips, leaving you in the best possible position to begin working for a client. As a result, this helps you increase efficiency and avoid bottlenecks further down the line.
Reduces scope creep: Set expectations early on, to ensure that both parties are aware of what scope creep looks like. By doing your due diligence upfront, you will be less likely to suffer from scope creep.
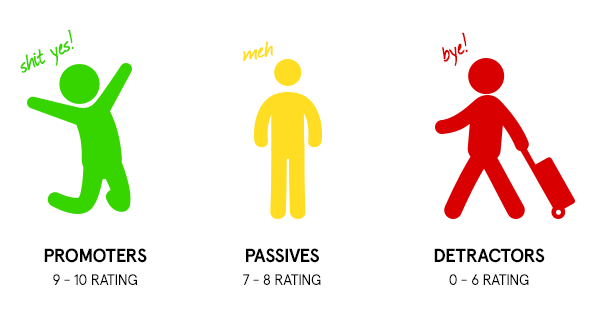
Happier clients: Clients want to work with practices that know what they’re doing, have a clear plan of action, and build strong relationships. When you demonstrate this, not only will your customers be happier, but it’ll also greatly increase your Net Promoter Score (NPS).
More clients: By delighting your customers early on, you’re far more likely to build strong relationships, upsell existing customers going forward, and gain referrals based on your excellent work and customer relationships. According to the Edelman Trust Barometer, 84% of B2B decision-makers begin their buying process with a referral.
Ensures compliance: Having a well-thought-out, highly repeatable onboarding process, helps you to ensure that compliance is baked into everything you do instead of a mere afterthought.
Not all onboarding processes are created equal. To enjoy the benefits listed above you must systemize and optimise your onboarding process so that it enables you to do efficient work and build effective relationships.
Client onboarding process (7 steps to success)
“We are what we repeatedly do. Excellence, then, is not an act, but a habit.”
- Will Durant
It’s crucial that every practice has a set, highly repeatable client onboarding process in place. If they do, they’ll kick relationships off on the right foot, gain all the information they need to wow their customers, and demonstrate their professionalism.
To achieve accounting excellence you need to form great habits —having a great client onboarding process is one such habit.
Every practice will have its own unique onboarding process that will depend on a variety of factors such as their internal capabilities, the services they offer, and their clients.
Provided below are a few guidelines you can follow to help you construct your own customized client onboarding process.

1. Proposal, contract and payment
First things first, you need to receive a signed contract (aka engagement letter) from your client. Don’t begin any of their work until you have a signed copy in your hands (or your inbox!) —in other words, until there’s a legally binding agreement between both parties, do not pass go, do not collect $200. . If you do go ahead without this agreement you run the risk of wasting precious time and money on a redundant project.
This contract should also include key pricing and billing details. If your business runs on a fixed-fee pricing model then Ignition is the ideal tool to help you achieve this.
But wait! There's more! Want to know the best part about Ignition?
Your contract and terms of service are attached to the business proposal. This means you only have to send one beautifully packaged document instead of sending a proposal, a contract, and an invoice separately. Bonus: You can also accept payments on your proposal for one-off or recurring payments.

If you're not using Ignition, you can piece everything together manually in four steps:
Create the proposal agreement and send it over (use Microsoft Word and a tool like Simul Docs to easily draft and collaborate on the proposal)
Build the contract and send it over (use DocuSign or have them print and sign it)
Send your invoice (via your preferred invoicing software)
Follow up with your client to collect the two signed documents and payment
If your business runs on a time-based pricing model, it's the exact same process but you'll just invoice your clients after the work has been completed.
Once you receive confirmation that the client has paid, signed the proposal, and signed the contract, you can then move on to the next step.
2. Client onboarding questionnaire
Before you begin working for a particular client, you need to ensure that you have all the necessary information to get started. That’s where onboarding questionnaires come in.
With a solution like Typeform, you can have the client upload files to your questions so you don't need to limit your client's answers to text.

Imagine you’re completing bookkeeping services for a client. In this case, you will need their receipts and records of payment before you can start working for them. Consider making this step (receiving their information) mandatory before you move forward in the process.
Here are some potential questions to include in your client onboarding questionnaire:
What is your business information? (address, phone number, etc.)
Who will be our main point of contact?
What would make this a successful project? (use real metrics if possible, e.g. 50 more leads)
Have you worked with a similar company in the past?
Can you supply logins and passwords to applicable software?
Bonus: consider asking for referrals at the bottom of the questionnaire— perhaps your new client has a friend or old colleague who could use your services too
Fun Fact: Did you know you can also automate your client questionnaire to be sent out with Ignition? Simply include a link to the survey in the proposal acceptance email.
3. Assign the client and get the project rolling
Once you have collected all the require information, you can now assign the client to the team taking over. Pro Tip, try to ensure that the lead point of contact has some commonalities with the client—this will help them build a strong working relationship.
Have a meeting with the team that’ll be taking on the client and debrief them with the following information:
Project summary
What would make this a successful project for the client
The timeline
Any applicable research on the client
What’s needed from the client to complete the project
It’s also important to share all previous communication—it can be frustrating for the client to have to repeat themselves to different members of your practice. Ideally, all of this information will be stored in your CRM or client management software.
Once the meeting is over, you should then launch the project in your preferred PMS (project management system) or workflow software: Basecamp, Asana, Workflow Max, Karbon, or others. If you usually invite clients to collaborate in the project, now’s the time to do it.
4. Have a client kickoff meeting
This is the meeting that gets it all started. Everybody (including the client) should be excited and ready to get this project off the ground. Client kickoff meetings are a great way to build trust and rapport with the clients and set the tone for the rest of the engagement.
In light of the coronavirus pandemic, face-to-face meetings are generally being replaced by video calls. Get the client to find a time that works through your calendar software (we use Calendly) to book a video conference. Make sure your video conferencing software works flawlessly—it's frustrating for everyone to have technical issues when you're having your first meeting. I've found Zoom to be the best option but it may vary depending on your location.These are some of the things you should go over in the client kickoff meeting:
Introductions between the client and the team
The client’s business goals
Cover major deliverables and responsibilities (including a detailed timeline of action)
What does scope creep look like? What happens in the event of scope creep occurring?
What are the next steps?
Final Q&A
By the end of the meeting you should have built a strong rapport between the client and your team, answered any of the client’s questions or queries, and outlined how the project will proceed.
Learn more about how to have an awesome kickoff meeting with 8 Steps to crush your initial client meeting.
5. Provide a welcome package
After your kickoff meeting make sure the client gets some sort of welcome package. This is an opportunity to educate your client and reinforce their purchase decision. Make them feel special—a little effort goes a long way!
Your welcome package can be a mix of both digital assets and physical products. Your package of digital assets might include:
Your 'business cheat sheet': A document that your client prints and references for any information they need about your business. It might outline regular business hours, location(s), contact information, emergency contact number, typical response times, and FAQs.
Homework: Are there any resources that your client has to read in order to get the most out of this project? For example, it could be a series of articles that helps them understand what's going on in greater detail.
Case studies: Have you delivered great results for similar companies in the past? Share these success stories with your client.
Welcome video: Creating a welcome video can be a great way to get your clients excited about working with you (see example below). This isn't limited to digital agencies! It's even better if you work in a so-called 'boring' industry and find a way to get your clients fired up.
Make sure to also send your client something physical. We all love receiving things in the post—clients are no different. You don't even need to be in the same country to send your clients something meaningful.
With a service like Handwrytten, you can type out a message to your client which will turn into a handwritten welcome letter to your client. Plus, you can use Zapier to automatically trigger the message to be sent out the minute they've paid your business.
That’s not all—it gets better! As stated above it’s a great idea to send something physical to new clients. If you’re stuck for ideas consider sending some swag! You can automatically send out branded hats or shirts to your clients from a service like Printfection. Not only will they love it (after all, who doesn’t love freebies?), but it's a fantastic branding opportunity for your business.
6. Checkup call
Schedule a check-up call 30 days after beginning to work with a client. This is your opportunity to make sure that nobody has dropped the ball during the onboarding process and to ensure that everything is running smoothly from their end.
Remember: The first 90-days are important in building a great first impression of your company. If you can catch mistakes early and remedy them going forward, you'll be able to retain more clients and build better relationships!
This check-up call is also a great time to gently nudge clients for more information or documents that they haven’t yet sent over. An email might get lost in their inbox or temporarily ignored. By raising it face-to-face you’re far more likely to elicit a response.
7. Refine and improve the process
Once the onboarding process is over, schedule another both parties to make sure that everything went as planned. Consider asking questions like:
Were there any unanswered questions in the onboarding questionnaire?
Is the client still unsure about the details regarding a project, its timeline, or who they’ll be dealing with?
Did a client like the swag you provided?
Are you still waiting on the client for anything?
You can also use a tool like Promoter.io to collect an NPS survey from the client. This will help you gauge how they're feeling and give you the chance to collect valuable feedback.
Your onboarding process is a constant work in progress that should be improved whenever possible. Collecting both quantitative and qualitative data, helps you to improve your processes and make informed decisions based on facts, not feelings.
Client onboarding checklist (12 point sample)
Checklists might seem basic. When used correctly, however, they can be a game-changer.
Take the book ‘The Checklist Manifesto’, written by surgeon Atul Gawande, MD. Essentially, the manifesto states that checklists are the first step to optimising any outcome, no matter what the process in question is or your industry.
Do you have a checklist in place for your client onboarding process? If you answered ‘no’, why not?
Clearly systemising your onboarding process with the help of a checklist greatly reduces human error and gives your team a clear list of tasks to work through. By laying out the precise end-to-end workflow you can ensure that every step is logical and contributes to the end goal: client satisfaction.
Using the above steps as a guide, break down your own onboarding process into repeatable steps and build out a checklist detailing the precise actions that need to be taken.
Jot these discoveries down on a piece of paper (though this isn’t easily shareable!), create a checklist in your project management software, use a Google sheet, or even a workflow automation tool like Process.st to begin actioning these steps.
For reference, here's a sample client onboarding checklist that I put together:
Welcome email: Send a welcome email with your Ignition proposal attached.
Onboarding questionnaire: Get the client to fill out your onboarding questionnaire.
Compliance and payment: Wait until the contract is signed and the client has paid. In an ideal world, you’ll set these up automatically so that you never again have to worry about late payments.
Pick your team: Based on your available resources, pick the best team to take on the new client. Consider if anyone has a particular interest in their industry or has previously worked on relevant projects.
Set up the project: Set up the project in your preferred project management system/workflow software and assign it to the team.
Internal meeting: Have an internal meeting and share all relevant information you might have on the client.
Introductions: Get your team to introduce themselves via email and include a link to book a kick-off meeting (preferably in person).
Kick-off meeting: Have the kick-off meeting and clearly communicate the next steps with the client. This is also your chance to set expectations and stipulate best practices when it comes to ongoing communication.
Follow-up: Have your team follow up with a 'thank you' email with your digital welcome package attached.
Welcome package: Send your physical welcome package (swag, handwritten letter, etc.).
Check-up call: 30 days later have a check-up call with your team and the client. Schedule regular check-ups going forward just to ensure that you’re always up-to-date with how everything is progressing.
Finished: You're now done client onboarding!
This might seem like a lot of work for a single client, but once you have a repeatable checklist in place, it'll be a breeze. In our experience: it’s worth the extra effort.
Over to you
You’re not meant to follow this guide word for word. Instead, we hope the suggestions in this article have given you some ideas and interesting tidbits to try within your own practice. Remember that the overarching goal is to make both you and your clients’ lives easier. If you have your own ideas to achieve this, try them out when onboarding your next client.
Do you have any client onboarding tricks that we’ve missed? Share them with us on social!